|
Attach the silk to the frame
Secure the claws around the frame. Attach the claws around the edges of the silk.
Wet the silk
In a saucer or ceramic or glass container fill enough water to completely wet the scarf. Note the amount of water you use, as you will use this estimation in preparing your background colours so you do not waste too much dye. Soak your brush in the water, then drain out any excess water back into the container and paint the entire scarf. In very dry weather conditions, this will assist in avoiding any lines created by the drying and condensing of colour too soon.
Preparing the backgound layers
For the background in the Tree of Life, cobalt blue has been selected and this has been divided into three shades by watering them down at various ratios plus the full strength colour. Prepare each of the colours in a saucer or a ceramic or glass container. From the amount of water you used to wet the scarf, use this estimate to create the amount required for background shades.
Background Layer 1 - 1/8 colour.
Take the cobalt blue and water it down about 8 times. This will cover your entire scarf, so ensure you have a full saucer of this shade. The full watered down dye should be the same amount as the water you used earlier, so use that estimate and fill the container with that amount.
Background Layer 2 - 1/4 colour.
Take the cobalt blue and water it down about 4 times in the saucer. This needs to cover 3/4 of the scarf.
Background Layer 3 - 1/2 colour.
Take the cobalt blue and add the same amount of water. This needs to cover 1/2 of the scarf.
Background Layer 4 - full colour.
This final layer, used for the base is the full strength of the blue. This needs to cover only 1/4 of the scarf.
Painting the Background
Check the dampness of the scarf. You may have to moisten it again with water.
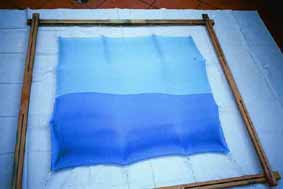
Background Layer 1
In the example, the first background is cobalt blue watered down 8 times. Paint all of the silk with this shade and ensure that all of the sides and corners are covered. Turn the frame over and check that you have covered the edges. If the edges have been rolled and sewed in place, it is easy to miss a small section. To avoid this, just run the brush around on the edge of the rolled up side pushing into the corners and around the claws.
If it is a hot day, you will need to work fast in applying the dye. If it drys too soon, the dye may leave a line mark. You can attempt to patch this with wetting the brush and pushing the condensed colour back into the main part of the silk.
Do not be too disappointed if there dry lines on your scarf, they may end up enhancing your art work and definitely ensuring that it is an individual creation. It may not be the individual art of your plan but the individual art of the evironment and the conditions that you respond to and compliment your art with.
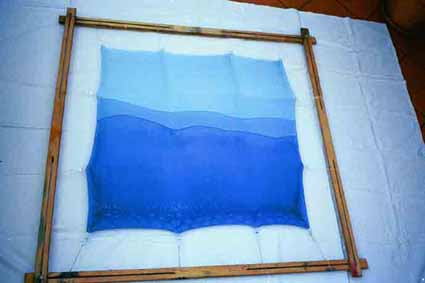
Background Layer 2
This layer is cobalt watered down 4 times. Paint this down the silk about three quarters of the way down. The first line is best applied in waves. This gives the impression of hills in the background.
Background Layer 3
This is half strength the cobalt colour. Paint this down the silk in a wavy fashion for the first line to give the impression of an uneven landscape.
Background Layer 4
You will use the full strength of cobalt for this layer. Paint this down the silk in a wavy fashion for the first line to give the impression of uneven landscape.
Finished Background
Now you have finished the background, wait until the silk has dryed before starting the border. If the weather is cool and it is taking a while to dry, you can use a hair brush to speed the drying process.
Border
You will use the full strength of cobalt for the border. Once the background is completely dry, then dip a large size brush in the paint. Dab the brush on the silk to create the effect of a rock. Do this all around the edge of the scarf. Using a smaller brush, dip this in the dye and dab this above the bottom edge you just completed. Use this technique to continue all around the edges of the scarf.
|